I can't blame the vendors, as I've always been delivered exactly what I ordered. I don't really want to accept blame myself either, as you can't deduce everything from photos of individual parts. I guess once again I'll blame the parts ecosystem that simply isn't designed to support the diy pinball hobbyist. I've never seen any write-ups detailing the correct style bulbs to use when making your own pinball from scratch. I guess it is up to me, then.
So here's what I chose for lighting, why it was wrong, and what I chose to replace it.
When it came time to choose the playfield lighting, I had many options to wade through. The easiest option was incandescent versus LED lighting - for so many reasons LED was the only option to consider, primary among those are low heat, longevity and power efficiency. A lot of people have upgraded their pinball machines, replacing the old incandescent bulbs with new LED's. Unfortunately, these old pinball machines were never designed with LED lighting in mind, and often LED's produce less than spectacular results. Since I was designing my Pinball from scratch, I had the luxury of choosing not just LED's but also the control circuits optimized for this type of lighting.
After that easy decision came a much harder one: pinball bulb sizes. From shopping around, it seemed that the most common sizes were the #44/#47 Bayonet Base and the #555 Wedge Base, but I also found other sizes like #89 Bayonets, #906 Wedges, and #86/#79/#73 Twist style sub miniature bulbs.
Whatever all that means.
Pictures were little help, as you couldn't actually tell much in the way of physical size in one bulb versus another. Reading up on various types of bulbs, there didn't seem to be any advantage to different styles.
 |
| #555 Wedge LED's (LEFT), #44/#47 Bayonet LED's (MIDDLE), and #89 Flasher LED's (RIGHT). They all look about the same size in the pictures, so it is hard to choose one over another. |
So I simply picked one that looked 'modern' and blindly pushed forward, unaware of my costly mistake.
 |
| My first choice for illumination, the Ablaze 4-SMD-LED super bright bulbs with the #555 Wedge Base. |
To go with the bulbs, I picked up bulb sockets. The bulbs were going in one of two places on the playfield: under plastic light inserts, and in holes for General Illumination (GI) lights that actually shine above the playfield. I figured I needed two different sockets tailored to each use case.
When I browsed through the available #555 Wedge lamp sockets, it appeared to me that there were only two sockets to consider. What didn't occur to me is that I needed more options.
 |
| #555 Wedge style lamp sockets. The left one looked good for playfield inserts, and the right one for GI locations. |
When it finally came time to install the lamps on the playfield, I decided to light one up to get a teaser of the awesome light show destined to be. Holding under the playfield the illuminated bulb installed in it's socket I immediately realized my mistake - the LED's were flush under the plastic inserts, and I could clearly make out the 4 bright spots of the individual diodes through the colored plastic inserts. The insert itself was mostly dim - just four bright dots in the center.
It looked horrible.
I had obviously purchased the wrong offset bulb sockets. Holding the bulb further away from the playfield, I found that an extra 1/2" seemed to be a good distance - the insert lit up brightly and evenly, and I could no longer discern the four dots. So the solution seemed simple, I just needed new sockets.
I decided to go ahead and check out the other sockets for the General Illumination and got an even bigger surprise. These sockets were supposed to extend up through the playfield, but the wide shoulders of the wedge shaped sockets were too large to fit the circular playfield holes. These sockets wouldn't fit the Firepower board, and I'm guessing they wouldn't fit the GI locations on most boards.
Why do these things even exist?
I realized that the other sockets, the ones I intended to use for the insert bulbs, could be used for the GI locations instead. Testing it out I was again disappointed, this time with the quality of the light coming from the bulb. The beam was too narrowly focused, and the large plastic artwork pieces were only partially lit.
So now I needed new sockets for the playfield insert bulbs, and new bulbs with a wider beam for the GI locations. Getting expensive, but not ridiculous. Not yet, anyway.
Shopping the various pinball parts vendors, I soon realized I had made a huge mistake in choosing the #555 Wedge style bulbs. A wedge style socket with a longer offset did not exist - I already had the longest offset, the socket that put the bulb flush with the playfield inserts. Reassessing my options, I discovered that the #44/#47 style bayonet sockets had a longer offset.
 |
| The #44/#47 Bayonet sockets had more mounting options, including this one with a much longer offset from the playfield. |
So now I needed new #44/#47 Bayonet style bulbs and sockets for the playfield inserts, plus new #555 Wedge style bulbs for the GI. Ouch, this was really going to ding the wallet. LED lights are expensive, even when you don't have buy the sockets, and I needed both.
From Pinball Life I ordered another 45 Ablaze 4-LED bulbs, this time in the #44/#47 Bayonet style, and enough sockets to go with it. For the GI lights I ordered up some Ablaze Frosted in the Wedge style. For a little fun, I got six of the #89 sized flasher 9-LED bulbs and sockets to see what they could do.
I also picked up a handful of LEDs from Marco Specialties just to compare them to the Ablaze LEDs. These were frosted as well. I didn't know they were Coin Taker LED's until I received them, as Marco doesn't advertise them with a brand name, but the CT markings on the bulbs are a dead giveaway.
 |
| #44 Base Warm White Frosted LED sold by Marco Specialties, turns out to be a Coin Taker LED. |
I've read good things about the Coin Takers on various forums, and I'll admit that these bulbs are beautiful. I ordered the warm whites, and if I didn't know better I would swear that these are incandescent bulbs! I'm now thinking about using these for all of my GI lighting.
But first I wanted to test all the new bulbs and sockets to see if the problem was resolved, and to see which GI bulbs looked best.
 |
| LEFT: #555 Wedge, RIGHT: #44/#47 Bayonet (both are green Ablaze 4-LEDs) |
In the picture above, you can see that the #555 Wedge socket inserts the bulb well into the playfield, almost touching the plastic insert, creating a hotspot. The new #44/#47 socket gives me much more clearance and spreads the light out.
In the picture below, you can see that the wedge bulb on the left has a definite hotspot, and if the big 'R' wasn't blocking the light, you would be able to make out the four tiny individual LED elements. The bayonet bulb on the right provides much more even lighting. Remember, the LED's are identical in both inserts, only the socket and bulb distance is different. The effect is even more dramatic in person.
 |
| LEFT: #555 Wedge, RIGHT: #44/#47 Bayonet (both are green Ablaze 4-LEDs) |
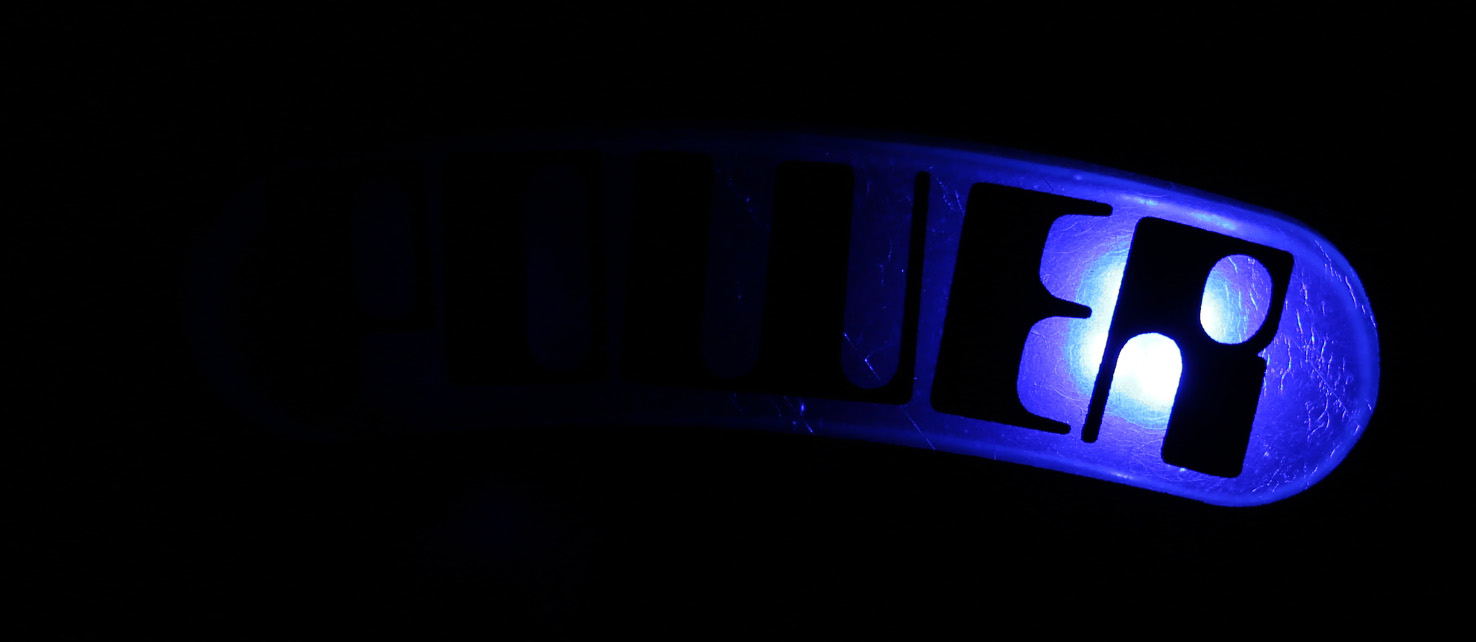
In the Firepower game, there are two large crescent shaped inserts, a red one that reads 'FIRE' and a blue one that reads 'POWER', in the middle of the playfield. In the original game, these inserts are lit up by three flasher bulbs each, and the circuit that controls these bulbs is a high powered, solenoid switched circuit. When I noticed that Pinball Life carried the Ablaze 9-LED flasher bulbs in the #89 Bayonet size, I decided to pick up some to use for these two inserts.
 |
| LEFT: 6.3 volt #44/#47 Bayonet, MIDDLE: Blank, RIGHT: 12 volt #89 Bayonet Flasher |
From reading various descriptions, I knew that the #89 bulbs were larger than the #44/#47 size bulbs, but I was surprised to see they were gigantic. Reading the markings on the bulb, I discovered that these flashers are 12 volt bulbs, not the 6.3 volts of the regular and GI bulbs. I wasn't too surprised by the higher voltage requirement, which explained why solenoids were used to switch these on and off instead of the normal illumination circuits.
I was still hopeful that these Ablaze 9-LED flasher bulbs would light up, perhaps dimmed a bit, on the lower voltage (5.0 volts in my test rig), but as you can see in the photo above they didn't light up at all. If I'm going to use these, I'll need to supply 12 volts. Luckily my chosen LED lighting module is capable of controlling multiple voltages, so these might still be an option.
 |
| This is the #44/#47 Ablaze 4-LED bulb. From this angle it has a hot spot, even with the greater distance of this socket. |
 |
| The same #44/#47 Ablaze 4-LED bulb, but from the player's perspective the hotspot is not visible and the lighting is even. |
After examining the evenness of the lighting from the single #44/#47 bulb, I think three of them may be sufficient for these larger inserts. I still plan to test the #89 12 volt flasher LEDs, which I expect to be much brighter, in the hope of making the gameplay as original as possible. I'm guessing that these flasher bulbs will be about 4-times brighter (12v versus 6.3v, and 9-LEDs versus 4-LEDs), bright enough to scorch retinas.
 |
| Testing the Ablaze 4-LED (LEFT) versus the Ablaze Frosted (RIGHT), both #555 Wedge sockets. |
Moving on to the General Illumination lights, I began by testing the Ablaze 4-LED bulbs against the Ablaze Frosted LED bulbs. I expected the frosted bulbs to be more omnidirectional and a little dimmer.
 |
| The top half is illuminated by the much brighter 4-LED Ablaze, and the bottom half by the Frosted Ablaze. |
 |
| Same test as above, but I adjusted the camera to take a darker picture, better illustrating how much brighter the Ablaze 4-LEDs (top half) are versus the Ablaze Frosted LEDs (bottom half). |
It's a little hard to declare a General Illumination winner in the Ablaze 4-LED versus Ablaze Frosted LED test, partly because the plastic artwork I chose for the test was a smaller piece over the slingshots. I'll have to compare again on some larger plastic pieces where I noticed the 4-LED bulbs seemed a bit too narrowly focused. My expectation is that the Frosted bulbs will be bright enough and will provide slightly more even lighting on the larger plastics. Since I have both types in the same #555 Wedge Base, I can always change my mind later.
 | ||
| The Ablaze Frosted LED (RIGHT) extended a little further through the playfield, and was softer on your eyes when viewed directly. The Ablaze 4-LED (LEFT) was less visible, but harsher when viewed directly. |
I then tested the Coin Taker Frosted LED (in Warm White) against the Ablaze 4-LED. Earlier I mentioned that I thought the Coin Taker LED was beautiful and looked very incandescent. Head-to-head against the Ablaze LED, the Coin Taker LED now appeared very yellow.
 |
| Ablaze 4-LED (LEFT) versus the Coin Taker Frosted Warm White (RIGHT) |
Unfortunately, this made the white sections of the plastic artwork appear old and grungy due to the yellow tinge. The brightness of the Coin Taker's was about the same as the Ablaze Frosted LED I tested above.
 |
| Ablaze 4-LED (TOP) versus the Coin Taker Frosted Warm White (BOTTOM). Notice the yellowing of the whites. |
The socket I was using to test the Coin Takers was the same #44/#47 Bayonet socket I had picked up for the plastic insert bulbs, and as you can see from the image above the bulb didn't extend fully through the playfield. To get a better representation of how the Coin Takers would perform, I bent the bracket and inserted the Coin Taker fully through the playfield, as you can see below.
 |
| Ablaze 4-LED (LEFT) versus the Coin Taker Frosted Warm White (RIGHT), this time inserted through the playfield. |
Surprisingly, the Coin Taker's brightness was now about equal to the Ablaze 4-LED bulb, and there was no hotspot either. Unfortunately, the Warm White color was still too yellow for my tastes, as the plastic looks dirty where illuminated by the Coin Taker in the image below (and in real life).
 |
| Ablaze 4-LED (TOP) versus the Coin Taker Frosted Warm White (BOTTOM) |
Coin Taker does make the same bulb in a Cool White (blue-white tint instead of yellow-white), though I'm not sure that they would much better than the Ablaze bulbs I already have. Just as the Warm Whites are too yellow, I can only wonder if the Cool Whites are too blue. When viewing the bulbs directly, the Coin Taker's are better to look at since they are softly frosted and have a nice rounded dome, but typically you don't look at pinball bulbs directly. I think I'll save my money and stick with the Ablaze LED's for now.
So, long story short, I've resolved my lighting woes and now need to actually install the bulbs and sockets. Back to work I go!
No comments:
Post a Comment