Well, except for that one sheared pop-bumper bolt I discovered in the cabinet a few months back, still clinging to the nut it liberated in its desperate attempt to escape a life of pinball attacks. It crossed my mind that perhaps I should see where the destroyed bolt was located, but since Williams style pop bumpers are connected with three bolts, I didn't give it too much thought. From the top side of the playfield, all four pop bumpers seemed solid.
Fast forward to the end of the 2017 Southern Fried Gaming Expo. While packing up Modern Firepower for the short trip home, I noticed another sheared pop bumper bolt lying underneath it on the floor. Though I couldn't rule out its origination coming from a nearby machine, in my gut I knew Modern Firepower was the source.
 |
| Modern Firepower at the 2017 Southern Fried Gaming Expo, next to an original classic Firepower - photo by Juan Josino |
Read on to see the Modern Firepower repairs, tune-ups, and the very special upgrade I installed...
Back home, Modern Firepower had to be disassembled for the move into my office. I designed Modern Firepower while living in my previous home, and the doorway was quite large and not a consideration. Two years ago when we moved into our new home, I was shocked to discover that the doorway to my new office was too narrow for the backbox. Modern Firepower's backbox holds a 32" TV - it is gorgeous, but ginormous too - and the backbox is 31 inches wide. This became an important consideration for The Black Knight Rises' new cabinet, as I downsized the "backglass" to a 27" monitor, and shrunk the width of the backbox to just 27.25" - it just squeaks through my office door.
The only way to move Modern Firepower through the office door is to remove the backbox. It's actually not that difficult: remove 2 hinge bolts, unplug the monitor power cable, the PC power cable, and two USB cables. Takes about 5 minutes each way.
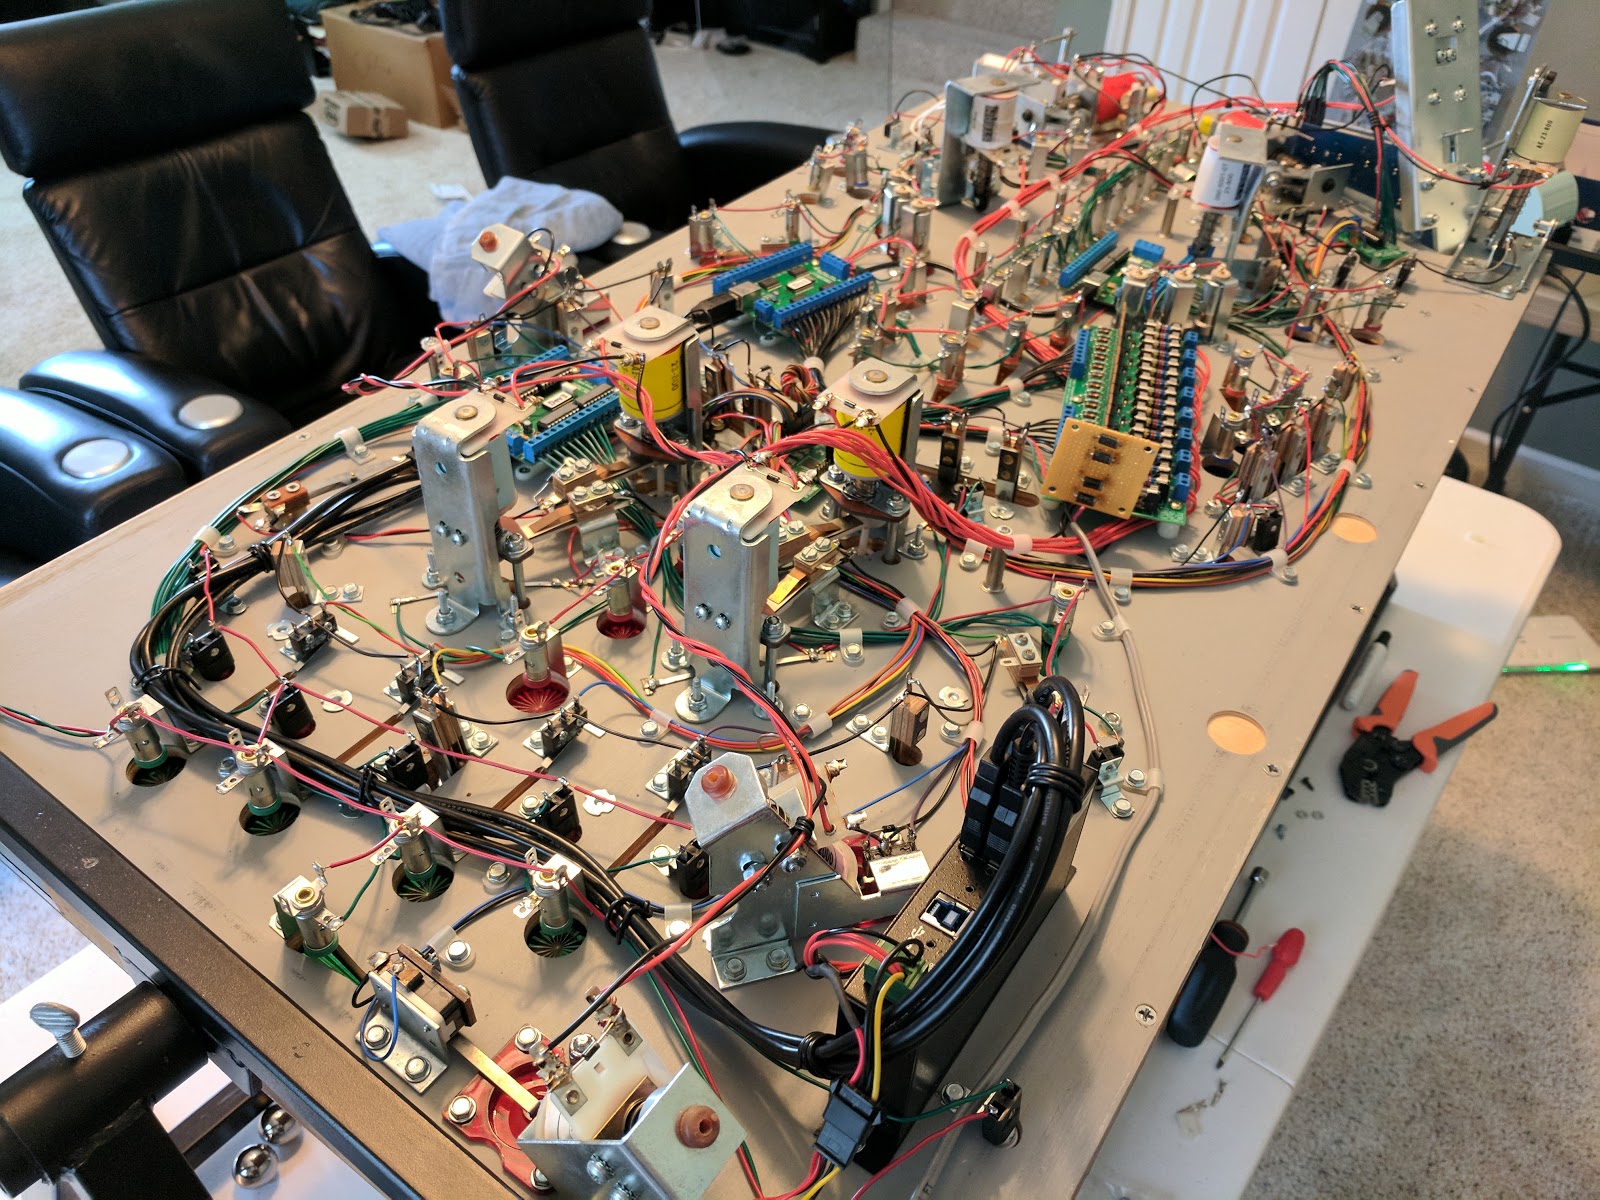
Since my office is located on the 2nd story floor, and the only stairway is narrow with a 180 degree turn, I also remove the playfield to make the job easier. The Modern Firepower cabinet is heavy, so removing 50 pounds makes the moving chore bearable without special stairclimbing tools. The playfield is removed even quicker than the backbox: simply raise the playfield upright and unplug 3 wires: 50v power, 5v/12v power, and USB. Then just lift the playfield out. Takes 2 minutes, tops.
In the office, the Modern Firepower playfield went directly onto the rotisserie. A quick examination revealed that, sure enough, two pop bumper bolts were completely sheared off, and both were on the same pop bumper. I found it very surprising how secure the pop bumper felt as I tried to wiggle it, holding on with all of its might with a single bolt. Regardless of its steadfastness, repairs were in order.
 |
| The two pop bumper bolts I replaced, a challenging task since I didn't remove the stapled bulb leads. |
The two bolts were surprisingly difficult to replace, but mostly because I didn't remove the pop bumper to replace them. The problem was that the lamp socket leads were stapled tightly to the bottom of the playfield, and I really didn't want to pry them up and re-solder the connections. With a bit of finesse I was able to extract the broken bolts, and with a bit more force, slide new bolts into place. The hard part was getting by the pop bumper skirt, which was blocking a clear path to the bolt holes. Luckily the skirt is soft, resilient plastic, and I was able to bend it just enough to get the bolts past it and into place.
As long as Modern Firepower was in the rotisserie, I decided to give it a once over and see if anything needed repairs. I found one wire on a kicker that had broken its connection, and another wire on a bulb socket that had never been soldered - doh! Those were quick fixes.
Next my eyes turned to the mess of USB cables. When I built Modern Firepower four years ago, I just used some spare USB cables I had lying around to connect the U-HID and 3 LED-Wizards to the industrial USB Hub I had mounted to the playfield. The cables were obviously too long, and I had bunched and tied up the extra length, which dangled from the USB hub. It was worse than just being unsightly, the USB cables were always getting in the way when re-inserting the playfield into the cabinet.
 |
| The originally used USB cables (white) were much too long, and I had to bundle the extra length. Also note the blue 12v/5v power connector bracket I had fashioned from a electrical outlet box, and the free-hanging 50 power connector. |
I measured the ideal length for all four USB cables, and with many hours of searching on the interwebs, I located four new replacement cables that were within an inch or two of being perfect. A week later, and they were installed and Modern Firepower was looking much tidier.
 |
| The new USB cables (black) are now the just right length to reach the USB devices - much better. |
Next up was a new bracket for the playfield power connections. I had sloppily carved a 12v/5v power connector bracket from a blue electrical box, and while it did the trick, it wasn't pretty. Plus, the 50v power connector was left dangling from the playfield, and one of the power wire connections had actually become un-crimped. I also wasn't a fan of the Radio Shack connector I was using, so I had recently picked up some new Molex connectors to replace them.
I knew my 3D printer was going to make easy work of a new bracket. After a quick design session in TinkerCad, within an hour I had a beautiful new bracket that held both power connectors. And this time, I used a proper crimp tool when attaching the pins to the wires, so no concern about them working loose at some point.
 |
| The custom designed 3D printed power bracket, holding the 50v Molex connector (white) and 12v/5v DIN connector. |
Modern Firepower had another problem I thought that the 3D printer could solve. In each bank of 3 central stand-up targets, the center targets lacked support, and would bend backwards after repeated ball hits, eventually bending far enough that when a ball hit it just right, the ball would be launched into the air, hitting the glass, and bounce all over the playfield. These standup target locations were originally designed for drop targets, and an extra slot was cut into the playfield behind the center target for the drop target mechanism. While posts were installed behind the outer targets, which worked with the rubber rings to prevent them from bending too far, this slot prevented the installation of a post behind the center target for additional bracing.
 |
| This early photo gives a good view of the slot cut behind the center targets - which prevents the installation of support posts |
After a bit of brainstorming, I decided to print a plug to fill the slot. I oversized the plug, making it slightly longer so that it would make contact with the back of the switch. I also designed tabs with screw holes, mostly to prevent the plug from falling out. I printed the plugs with a solid infill to make them as strong as possible.
 |
| The part I designed in TinkerCad to plug the slot and brace the center stand-up target. |
My first design printed quickly and fit perfectly in the slot, though it didn't quite contact the switch. Instead of modifying the design, I simply wedged a flathead screwdriver into the slot to push the plug against the switch, then installed the screws. Now the plug was secure, and it applied constant pressure to the back of the switch. Hopefully this will stand up (pun intended, heh) to the repeated impacts of flying steel balls - only time will tell.
 |
| 3D printed plug for the drop target slot. It pushes against the center switch to provide support, and is secured with screws. |
Next to be tuned-up were the leaf switches. I checked and adjusted every switch to make them as responsive as possible. A few stand-up switches, like those behind rubber rings, were actually bent out of shape and required quite a bit of bending to get them working again. Pinball machines are harsh environments.
When I attended the Southern Fried Gaming Expo, I played as many pinball machines as I could, looking for new features to implement. One thing I noticed is that I really enjoyed games that had an automatic ball launcher, especially during multi-ball and ball-saved events. I don't particularly like pinball machines that use a button to launch the ball, as I really like the feel of pulling back the plunger (or slamming it forward) and using my crazy mad pinball skills to control the launch.
Some games incorporated both a plunger and an auto ball launcher, and those were my favorite. I had to have this. Immediately after the show, I researched ball launchers, and purchased this bit of kit from PinballLife.com:
 |
| A Williams Shooter Lane Auto Kicker Assembly. |
One look at The Black Knight Rises, and I realized it wouldn't fit without some serious component replacement - the ball ramp thrower solenoid was located in the exact spot the ball launcher would need to be installed.
 | |
| On The Black Knight Rises the ball ramp thrower is in the way of installing a ball launcher. |
On Modern Firepower, real estate was promising, but I soon discovered that the modern style 7-ball ball trough that I had retrofitted was blocking the proper placement of the ball launcher by a few millimeters.
After a few days to consider my options, I decided Modern Firepower was the better candidate for the ball launcher. With Dremel in hand, I began carving away metal. First I cut the ball launcher bracket to fit around the ball trough, and got the launcher almost in place. Then I cut a small corner off of the ball trough, and everything finally nestled into place. When cutting away the metal, I made sure to always remove material from areas that wouldn't impact durability or functionality. Luckily, both parts appeared to be over engineered, so removing a bit of metal wasn't a concern.
 |
| The retrofitted modern style ball trough and the auto ball launcher want to occupy the same spot... |
When screwing the auto ball launcher to the playfield, I paid special attention to locating it in the proper fore-aft position. Too far towards the backglass, and the plunger might not make contact with the ball, too far towards the plunger, and the ball might rest on the plunger tip instead of the ball launcher.
 |
| I aligned the two metal tabs on the ball launcher, holding the ball, vertically with the edge of the ball shooter lane. |
Luckily I found a few pictures online that allowed me to discern the correct alignment - the edge of the ball launcher that contacts the ball should be vertically aligned with the edge of the ball shooter lane.
 |
| Look closely, and you'll see that the ball trough intersects the ball launcher. |
With the ball launcher mounted, next came wiring it up. The ball shooter lane switch was easy, as there was enough wire to simply snip off the old switch, and solder the wires to the new switch. The solenoid power wires were just as easy. I extended a ground wire from the nearby ball trough solenoid, and ran a new power/signal wire from the power driver board, which had 2 open and unused connections.
 |
| The new Auto Ball Launcher was easily wired to Sol 8. Sol 9 is still unused, wonder what else I could install... |
Installing the auto ball launcher exemplifies the benefits of my pinball electronics approach. With the power driver mounted directly on the playfield, less than 3 feet of wire was needed to connect the solenoid. My modular, plug and play approach to wiring allows any power driver connection to be wired to any solenoid. Later, the new solenoid will be mapped in software by a mapping routine, making it available to the program to use it.
I'm fairly certain that adding an auto ball launcher to an original Williams Firepower, or any other game not originally designed for one, would be next to impossible. With my solution, not only was it possible, it was extremely easy.
Before going back into the cabinet, I gave the playfield a quick polish. I also noticed that a lot of the white rubber rings have started to collect black soot, making them look grimy. For now I decided to leave them as-is, as it wasn't so obvious during game-play.
Turning my attention to the cabinet, my next task was to give the ball plunger a tune-up. It never did launch the ball with authority, and based upon some friendly advice, I had inserted a nut at the end of the tip under the tip cap to give it some more reach, which helped a lot. But the tip cover was becoming worn and starting to slip off, so I knew I needed to find a proper fix.
 |
| The new stronger Purple (looks black in photo) ball plunger inner spring (installed) replaced the standard silver spring. |
While shopping for parts for The Black Knight Rises build, I had stumbled upon the ball plunger inner springs on PinballLife.com. For some of the springs, they gave a short write-up on what the different spring colors represented. From weakest to strongest, the spring are colored Blue, Green, Standard (gray/silver), Orange, Purple, and Red. I purchased a Red spring for The Black Knight Rises, as I wanted to make sure it could propel the ball to the upper playfield. I picked up extra Orange and Purple springs to give me some tuning options, and it occurred to me that the Purple spring might be part of the solution for Modern Firepower.
Replacing the spring only took a couple minutes. I also removed the cabinet protector guard I had installed between the ball shooter assembly and the cabinet. While it wasn't super thick, the plastic guard did shift the tip of the ball plunger away from the ball by a couple crucial millimeters.
 |
| I measured and marked the siderail where wood needed to be removed to clear the new auto ball launcher bracket. |
While working on the ball plunger, a new concern popped into my head - would the new auto ball launcher bracket hit the cabinet playfield support rails? After all, I over engineered the Modern Firepower cabinet, especially the rails which extend the full length of the playfield. Sure enough, when I measured I discovered the ball launcher bracket would definitely hit the support rail.
 |
| A hammer and chisel made quick work of the siderail wood. |
I marked off the area to be removed, and with a hammer and a sharp chisel I made quick work of the rail resizing.
 |
| The finished result... now where's my paint? |
I then test fit the playfield, and found that it wouldn't lay flat. Turns out I needed to remove a smidgen more wood.
 |
| Here you can see the metal bracket of the auto ball launcher still hitting the wood support rails, lifting the playfield slightly. |
With a bit more carpentry, finally the playfield slipped into place.
 |
| With a bit of extra wood removed, the playfield now rested directly on the support rails. |
I went ahead and connected the the power and USB cables from the cabinet to the playfield, finding that the new power connector mounting bracket made this process even quicker than before.
A quick mention of the solenoid power supply - you might remember that I built my own 50v/10A unregulated power supply for Modern Firepower. The parts alone cost over $100, plus I had to assemble the power supply, and the end result was a big heavy monstrosity. Fast forward a few years, and one day while buying a CNC spindle and controller, I noticed the company also sold a 48V/7.3A switching power supply for $40 - part # KL-350-48. Small, lightweight, and affordable - yes please. I wasn't sure if it could do the job, but for two Jacksons I was willing to gamble.
 |
| My original home built 50v power supply (bottom of pic) - large, heavy, expensive. |
I installed the new power supply just before the Southern Fried Gaming Expo, and it has been running like a champ ever since. In fact, my perception is that the new power supply gave a little more spunk to the solenoids, which seemed to hit harder than before. The only complaint that I have about this unit is that the cooling fan can be a touch noisy, but I addressed that by installing the power supply at the back end of the cabinet, far enough away that I can't hear it during normal game-play. I picked up a similar style 38v power supply for The Black Knight Rises.
 |
| The replacement 48v power supply (silver) - small, light, cheap. |
Modern Firepower played wonderfully.
The ball plunger now made excellent contact with the ball and easily drove it to the top of the playfield, and I could definitely feel the extra resistance of the stronger Purple spring. The removal of the cabinet guard, and proper positioning of the auto ball launcher, worked together to ensure the plunger tip made solid contact with the ball. Problem solved.
Even after many repeated hits on the center stand up targets, they appeared to be standing their ground, not bending even a millimeter. Looks like another problem solved.
All the switches seemed much livelier than before - a few switches that had been hard to hit were now much easier.
Actually, a few switches were now too lively - the pop bumpers and kickers/slingshots would self activate from their own vibrations, and fire many times in a row once a ball got them going. The solution is debounce code, which has been sorely lacking from my software.
With the Modern Firepower upgrades and tune-up complete, my next task is to work on software updates. I need to add in a routine for the auto ball launcher, the missing debounce logic, plus a ton of new features from a list a mile long - much of which is to support The Black Knight Rises, and some just a new capabilities and performance improvements.
Look for those updates soon...
No comments:
Post a Comment